Restoring an old anvil

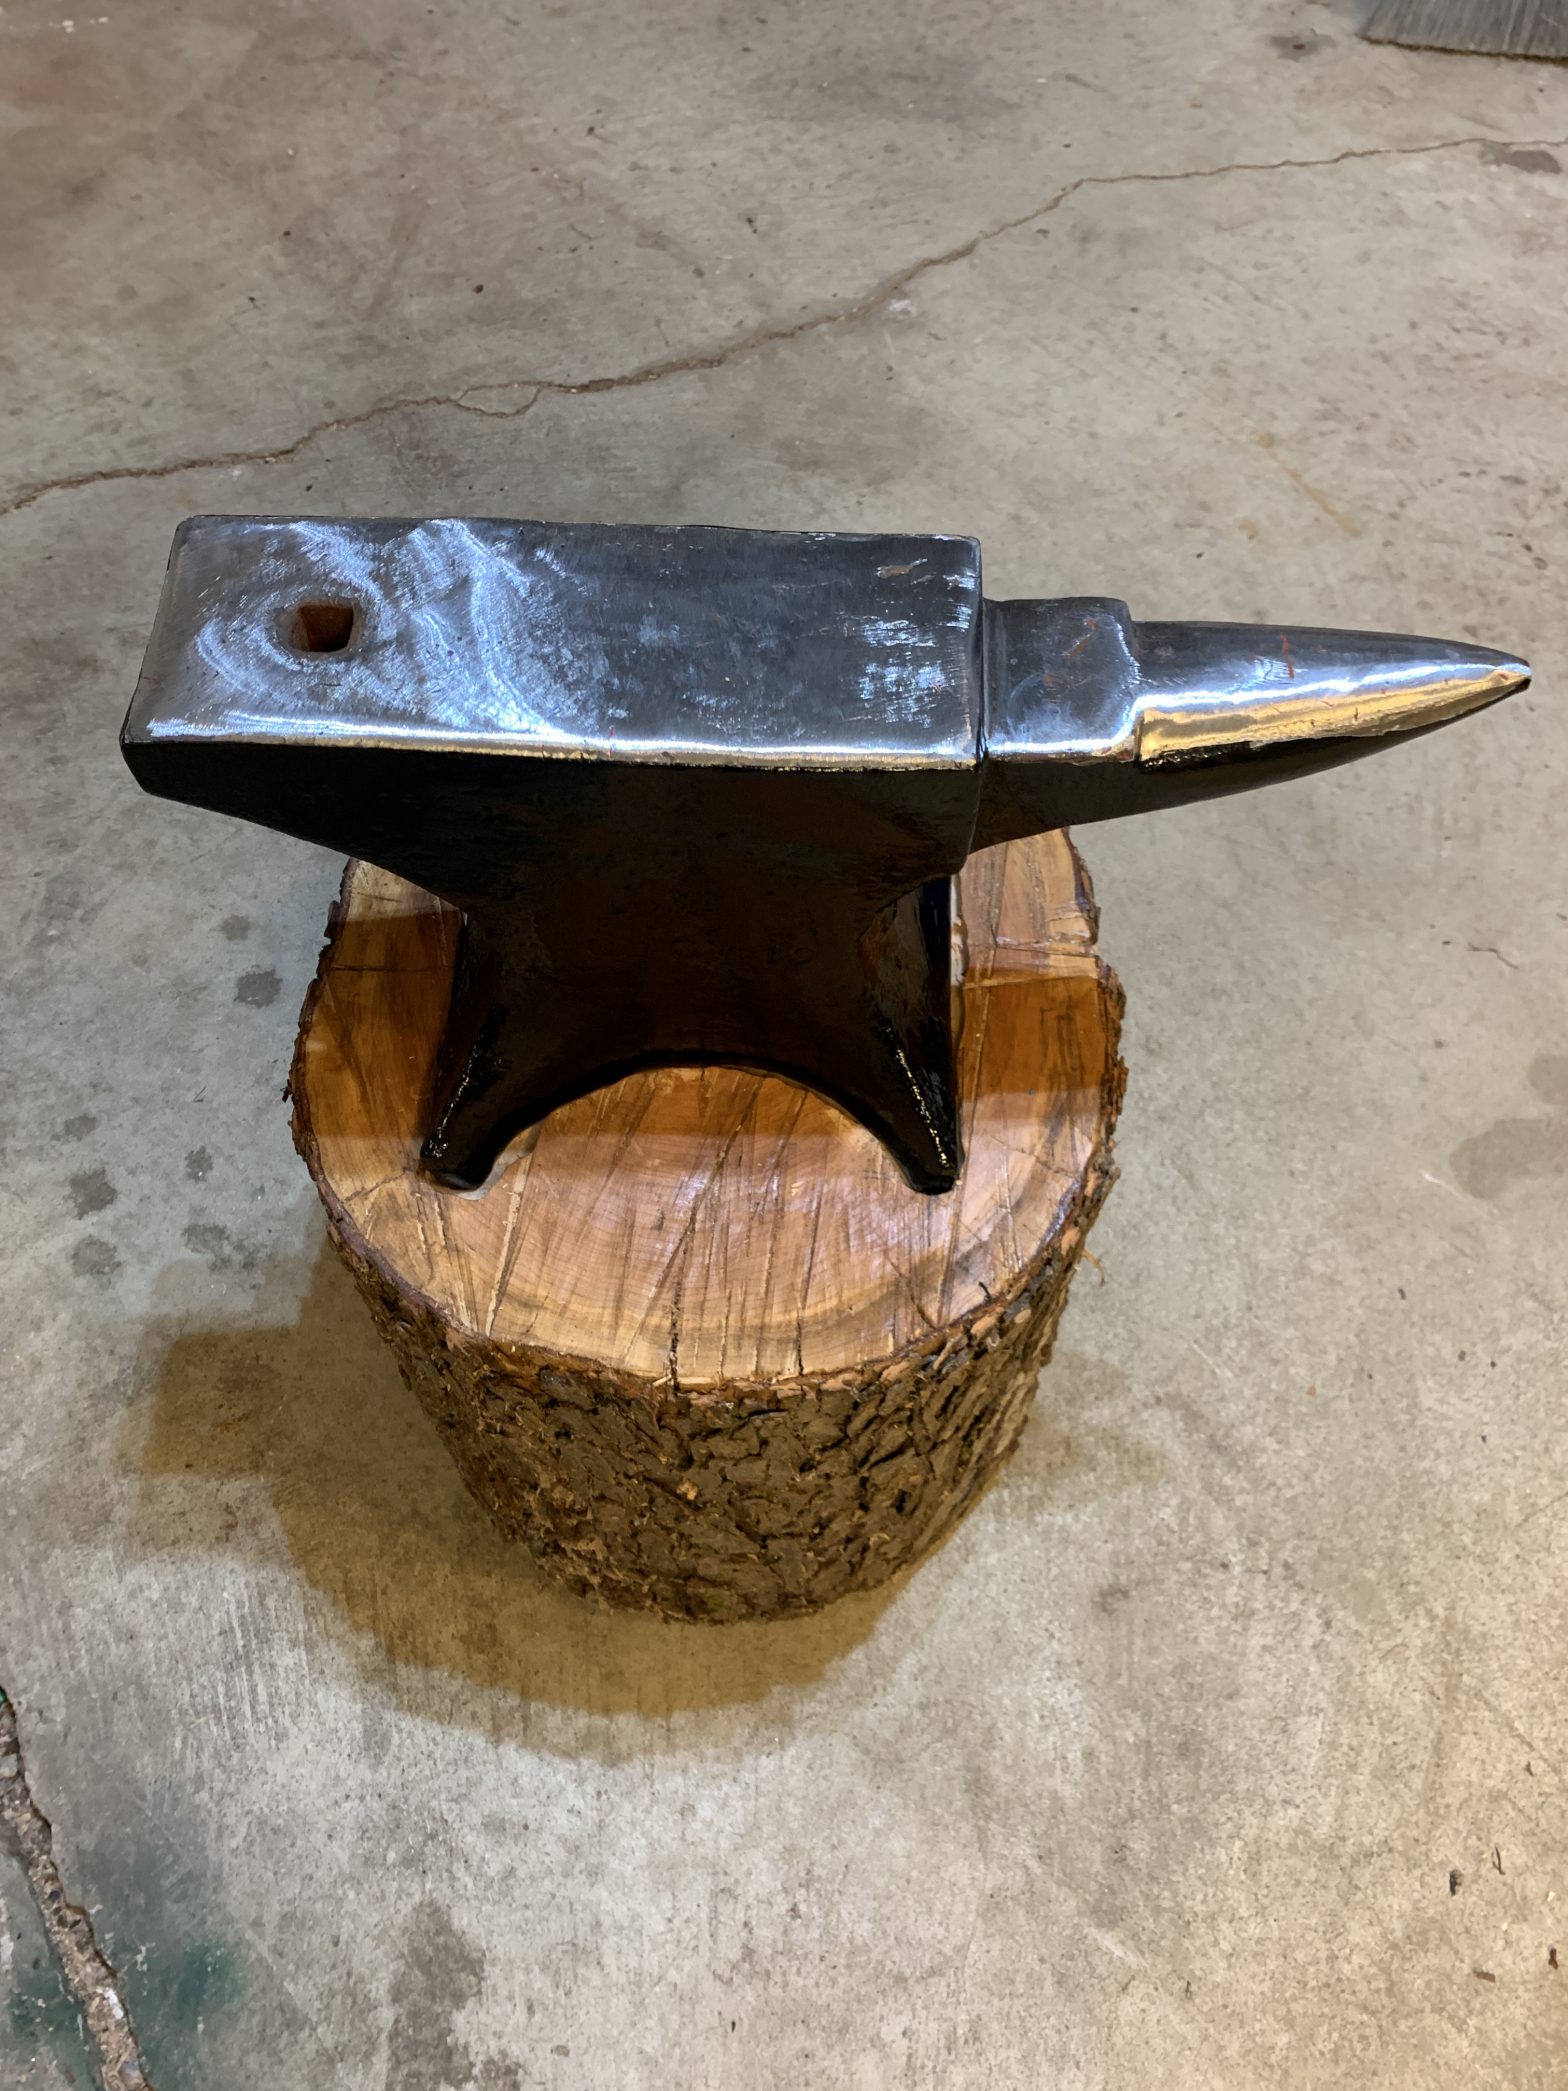
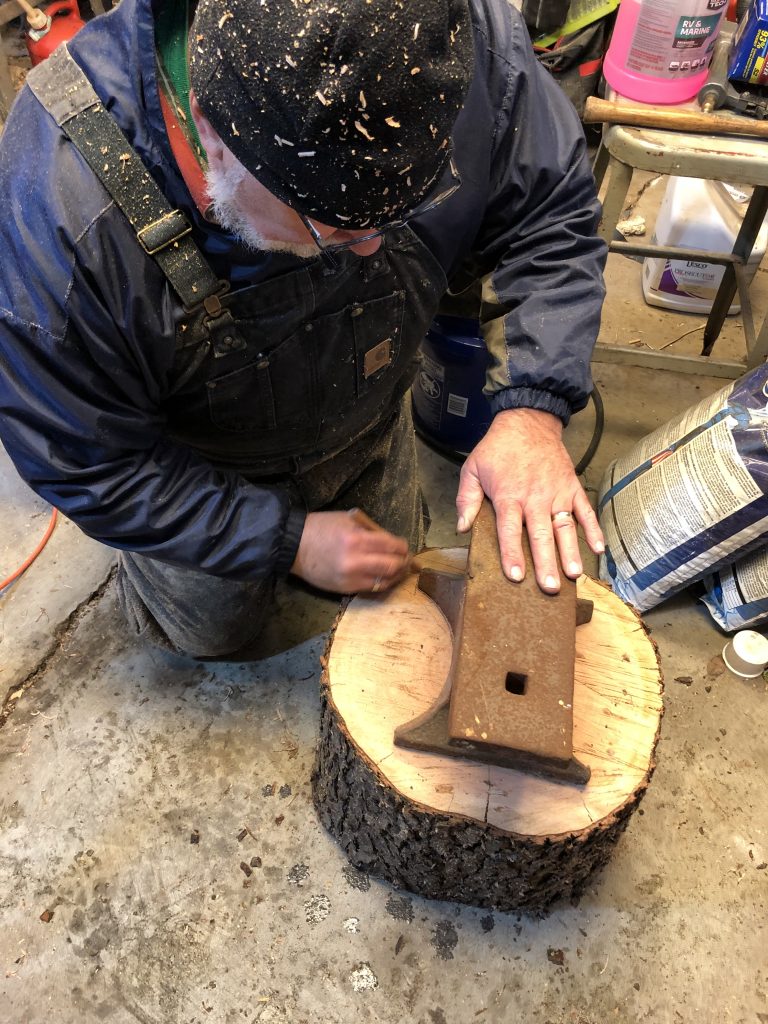
I picked up this anvil a couple of years back thinking I would get it home and restore it the same week. Well that didn’t happen! At Christmas my son was home for a visit, we ran across it in the shop and decided to make a base for it. We found a piece of cherry log approximately 18″ in diameter, trimmed it up a bit and marked the shape of the anvil on one end.

After a bit of discussion on how to remove the end grain of this cherry, we decided on the router with a straight bit, freehand. Go slow if your doing this freehand, end grain will catch the router bit and it will run out on you!

The anvil must weigh at least 80-100 pounds! It has some faint markings on it “USA 0 . 3 . 19″ not sue of the maker. The top surface of the anvil had a large gouge or a burn out from a cutting torch. I welded the hole in using Eutectic 640 chrome alloy rod with my arc welder. I ground the weld down with my 4” grinder, then switched to a flap disk to clean the surface up. A bit of sanding and hitting the entire anvil with my wire cup, it was ready for a coat of paint. I sprayed it with primer then two coats of implement enamel from TSC. This is good paint. This will be a nice edition to the shop!

Soup broth!

Making your own soup broth is very easy. Requires no fancy recipe, yields a great product with very basic ingredients.

Having a large family, we usually prepare two Thanksgiving turkeys averaging around twenty pounds each. After carving and de-boning each bird, I freeze the carcasses for soup. Taking advantage of this past long weekend, I set aside a couple of hours to prepare this years soup broth. We use this broth as a base for most of our soup dishes.

I am fortunate to have an electric stove in my shop for all day simmering and baking dishes that will smell up the house! My wife appreciates this for sure.

Ingredients:

Carcass of a baked turkey or a couple of chickens. Store bought rotisserie chickens work too! Celery stalks, carrots, parsley and three medium onions. I shop our local grocery discount rack for my broth vegetables, outdated or bruised vegetables work great for this recipe. Rough chop the veggies, and separate the carcass a bit.

To a large stock pot (mine is a 20 quart) add the turkey or chicken and vegetables. Fill the pot with water three inches from the top. Add two tablespoons each of salt and peppercorns. Bring the pot to a boil, turn down to a simmer for a minimum of four hours. Strain and fill the broth into quart soup containers. I purchase these containers from Amazon.

Let cool overnight, cap the filled containers and freeze. These will keep up to a year in the freezer.

Giving new life to an old dutch oven

I was helping my mom the other day re-arranging some stuff in her attic. Mom is 83, a very active 83, but I still get nervous for her to pull the garage attic ladder down and navigate the stairs. As she was digging around some boxes, she asked if I wanted my grandmothers dutch oven? I was thrilled! Its an old #9 Griswold dutch oven with a Tite -Top lid. The inside is a bit pitted and rusty, but definitely usable. My grandmother on my fathers side was an outdoors woman from West Virginia. She loved to camp and fish the rivers for trout. This dutch oven was used over an open camp fire many, many times.

After a couple of hours of sanding and hitting it with a wire cup and grinder, it was ready for seasoning. I cant wait to start cooking in it and taking it camping for a pot of chili.

Cowboy Kent Rollins has a great YouTube video on how to season and care for cast Iron. Check it out!

Making a wire clamping tool

Having the right size hose clamp on hand or needing a large clamp usually means a trip to the big box store. Worse yet, not having a clamp that fits in your emergency bag while on a trip.

Here’s an easy project to make your own wire clamp tool.

There are a bunch of designs on YouTube and some great videos on how to build them step by step. My version is very simple, an old router wrench and a 7/16″ bolt and washer. I filed a notch in the end of the wrench to accept the wire loop and drilled a 7/16″ hole in the wrench. I cut the threads off the bolt and drilled two 3/16″ holes in the bolt to accept the wire. You can go smaller, I chose 3/16″ so I could use 10 gauge wire for heavy wood binding. I welded a washer between the holes on the bolt to control the bolt on the wrench. You can use any size wire you would like. For the mallet repair, I used 10 gauge galvanized wire. The small 3/8″ hose repair, I used galvanized bailing wire. You can use copper wire, coat hanger or aluminum wire.

This tool and 10 feet of bailing wire will definitely be in my vehicle emergency bag!

Christmas Ornaments

Getting together with family at Christmas is a tradition I have enjoyed since I was a child. Food, gift giving and decorations is what makes Christmas a special time of year. Years back my wife’s family started a tradition to exchange tree ornaments, pulling names so everyone ends up with an ornament. I pulled my brother in laws name, he is a collector and a woodworker, so I decided to make his ornament in lieu of purchasing a store bought. The year was 2006, I decided on a small birdhouse ornament. I continued making a birdhouse ornament each year. When my son finished college he mentioned he would love an ornament as well, now I make two!

Each birdhouse ornament is unique in its own way. I theme them off of jobs I had, building trades, and events.

First year
2007
2008 “The Plumber”
2009 Homegrown Bamboo
2010 Turned acorn
2011 Tinsmith
2012 Electrician
2013 Jail Bird
2014 Bow hunter
2015 Wood chopper
2016 Camper
2017 Mechanic
2018 Welder
2019 Xmas tree salesman
2020 Pandemic Hospital