Camping in comfort!

People that know me, know I love to camp. We mostly camp at State Parks and hope to camp more in the future. Retirement is a short 16 months away. My wife Linda, our son and I have been camping since 2002 when we purchased our first camper. I seen the camper for sale in the next town over, I couldn’t wait to get home to tell my wife Linda. We headed over that evening and bought the 2000 Coleman Taos Pop up!

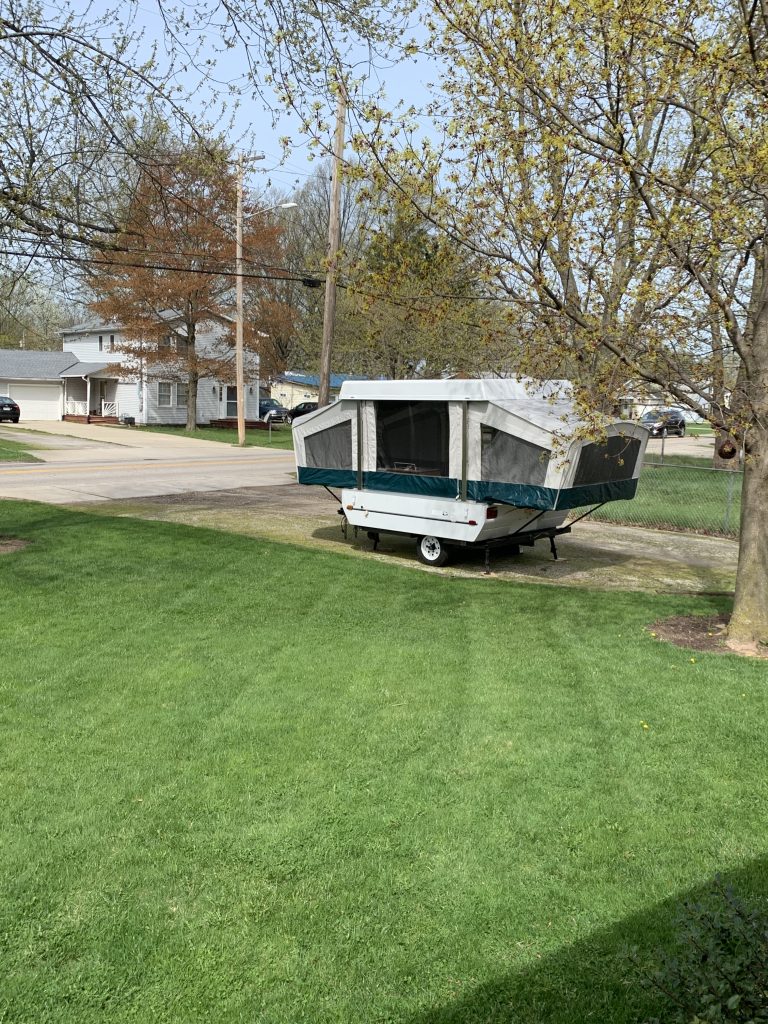
Our first Camper! 2000 Coleman Taos Pop up. No frills ~ 17′ long with the beds deployed, 6′ 6″ wide. No restroom, cooler for a fridge, propane stove and a dry sink. We absolutely loved it!

My wife, son and I camped in our little camper for 18 years when we decided we needed something larger. My son Chuck graduated from college, got married and moved out of state. My wife and I were tired of running to the shower house to use the restroom and needed a more comfy mattress. The search was on! We had minimum requirements….. Bathroom with a shower, refrigerator, slide out and a larger bed. We, or should I say I decided we should go with a Hybrid camper. Sort of a cross between a Pop up and a hard side pull behind camper. The benefits are lots of room inside because the beds are extended outside the body of the camper. I convinced Linda and we scoured the internet for months. One afternoon Linda asked me if I was up to a project? She had found a camper on Craigslist a 100 miles away but it was in rough shape. The young man attempted to remodel the camper and lost interest. I called the number on the listing…. well this grouchy old guy yelled at me saying ” I don’t have a God Damned Camper and I wish people would stop calling me!” And hung up. I thought jeez! I dug a little deeper on the Craigslist site and found a phone number the the last two digits were not transposed ( a typo when he posted ) called him and set up an appointment to visit that weekend. The young man mentioned I was the only one interested in his camper, I was his first caller. I made no mention of his wrong phone number! After an hour and a half drive we pulled up, Linda was right, it needed work! Surprisingly it passed the smell test. Despite all the work needed to get it camp worthy, it was a great buy. We were excited!

Screenshot

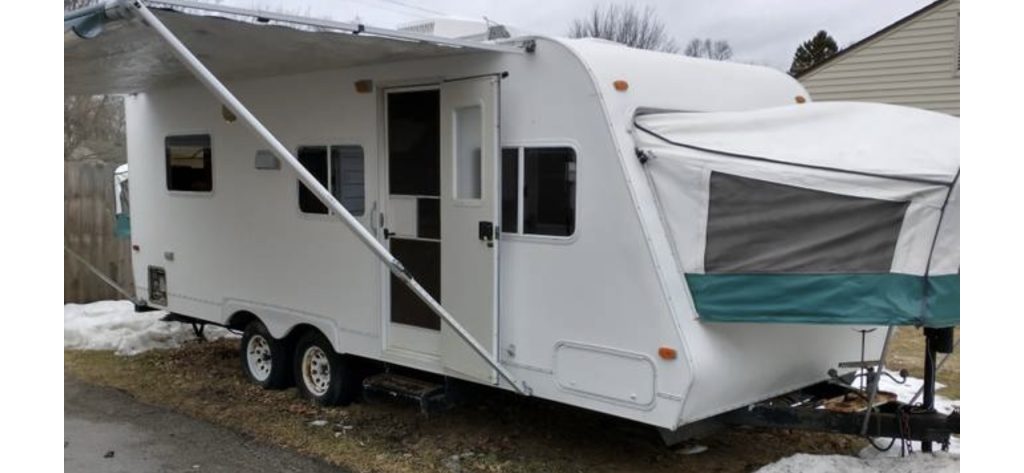
2003 Forest River Hybrid Cougar

Bad tires, toilet, bathtub shower and cabinets had been removed. The young man replaced the floor, roof and repainted the outside. The tent canvas was in pretty good shape, just stained and dirty. Lots of potential, smelled good so we bought it!

Prepping for the trip home!

New tires and wheels

We found a parking lot around the corner from the seller, got the jack and tools out to swap out the old wheels. I wasn’t willing to take a chance on the old ones 100 miles away from home.

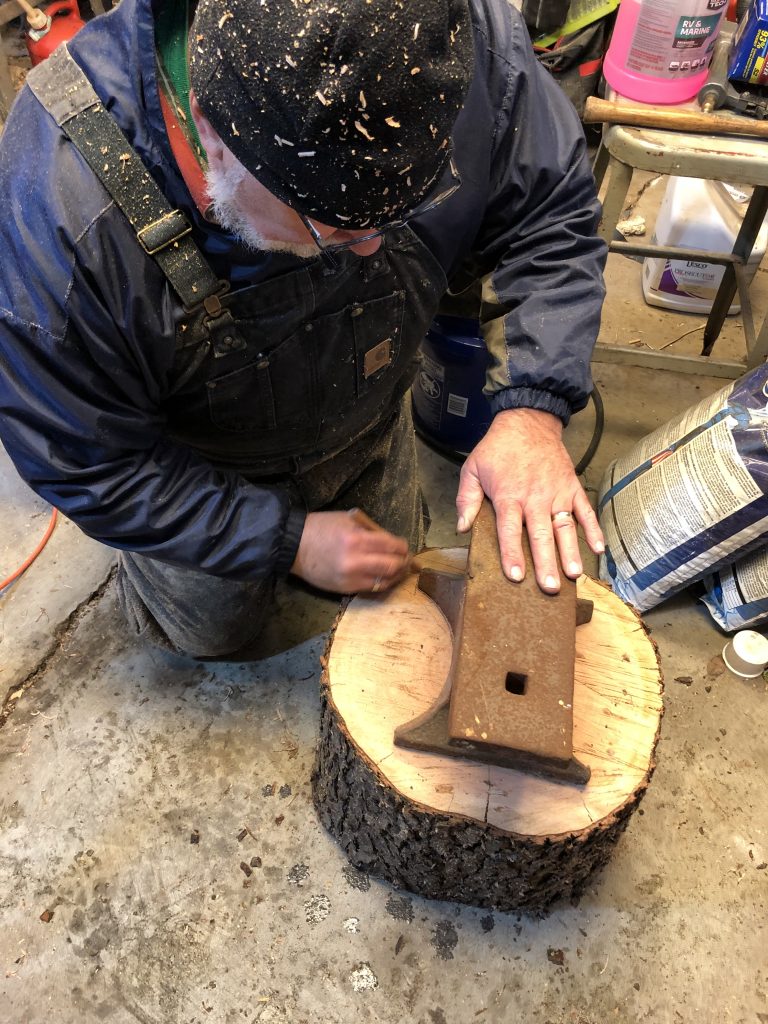
Time to start the renovation

It was ugly inside!

Bathroom

I upgraded the fan, installed a cedar ceiling and wall panels. Tiny sink and upgraded to PEX plumbing.

Kitchen

Finished Kitchen! I

Cushion recovering

Replacing cushion covers are no easy task. We found a website that claimed DIY Box cushion covers in 30 minutes! Watching and watching SailRite videos and 2 hours later…. We did it!

Thankfully Linda is a talented self taught seamstress! We pulled out the antique Singer machine and created our first Box Cushion cover.

Outside

Finally we completed the renovation, We thought this was the forever camper for us! Completely renovated to our liking, a hybrid camper to enjoy the feel of the outdoors while you sleep with a shower and a fridge. We camped in the camper for three years and we were quick to discover the tent camper of our dreams was super hot in the summer and damp on the trips that rained all weekend. On one of our last camping trips we were parked across from a retired couple in a fifth wheel camper. One of my concerns with our camper was the towing stability. We had a lot of sway over 55 mph, when a semi truck passed us we started to pray! The vacuum pulled us toward the passing truck, scary! After quizzing the old timer, he probably was only ten years older than me! about sway with his fifth wheel, he said son there is no sway. I was sold…. on the hunt for an upgrade!

We searched the internet for months, visited a couple of possibilities but none we visited felt right. During our search we decided to upgrade my pickup truck to a 2500 HD and look for a fifth wheel hitch.

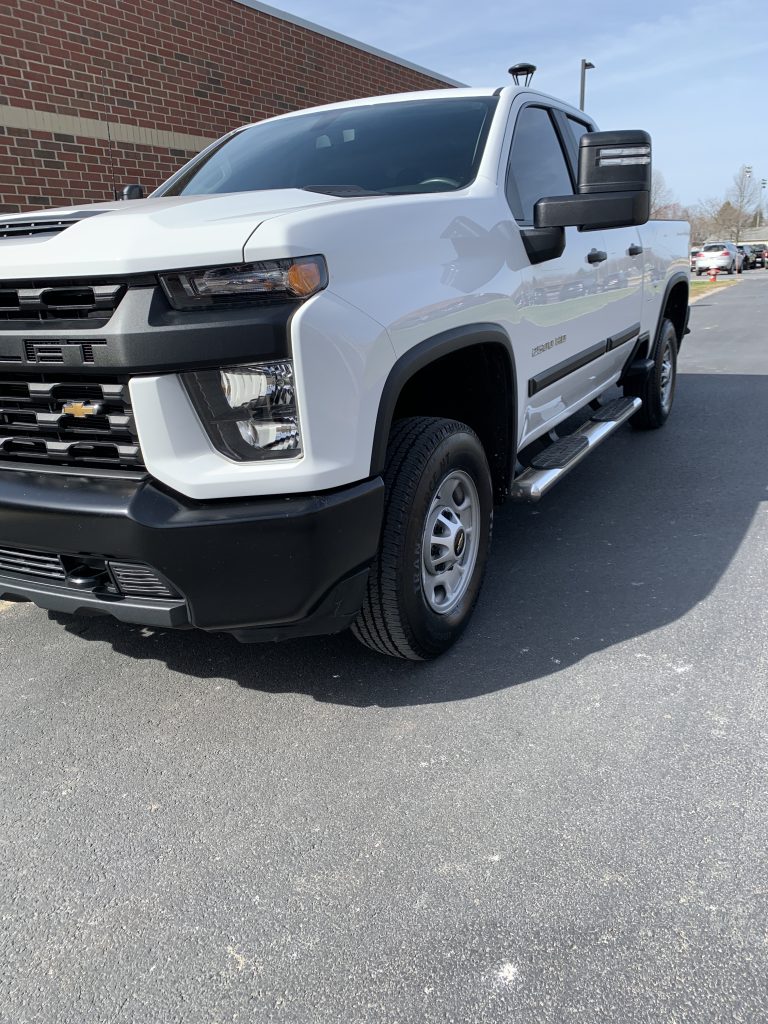
I upgraded my truck! 2021 Chevy Silverado 2500 HD

I searched high and low for an affordable hitch. Two days before Easter I found one in the next town over. A young man bought a farm truck with a hitch in the back, he didn’t need. I bought it, he was super happy to sell it and I was thrilled to get it for $100 dollars!

After a little TLC, disassembly, lubed and a paint job, its good as new.

Now to find our camper!

One evening I was surfing marketplace and found one in Michigan we just had to see. After a couple of phone calls we were on our way to Lake Shores, Michigan.

We instantly fell in love with the camper! We Bought it!

2016 Forest River Puma 30′ Fifth Wheel Camper

So far we have camped in our new rig five or six times, including a trip to Kentucky. We can cruise the speed limit with no sway, no drift. I think this one is a keeper. Sorry for the long post! I had a lot to say.

Milling timber in Georgia

A while back my Brother and sister-in-law had a large oak tree blow down at their home in Ball Ground, Ga a result of high winds during a thunder storm. I heard about it, seen some photos of the damage to their camper shed and thought we need to mill some of that tree! By the time I had a chance to talk to my brother-in-law Kevin about possibly milling the log, a friend of his had already pushed the tree over the hill with his skid steer. Kevin is usually game for anything out of the normal, so I told him we would travel down the 11 hours to try out my Alaskan Chainsaw Mill that was still in the box from the Christmas! Kevin spent the next two days rigging and winching the 20″ x 14′ log back up onto flat ground! After some trial and error we got the hang of it. Its not as easy as it looks on YouTube!

Trimmed up logs, ready to mill!

Creating a flat edge for the first cut. Half of an extension ladder works well. My Husqvarna Farm Boss saw with a 32″ bar.

Squared off two sides, Ready to mill.

We cut my boards about 76″ long. One at two inches thick and the rest at three inches. These will go back to Ohio to dry then on to my sons place in New York.

Fresh Sausage!

Last Saturday I had the opportunity to work with a group of folks making homemade fresh sausage. My 87 year old mom regularly volunteers at an old Hungarian church called Hungarian Reformed Church of Lorain, Ohio. Chatting with mom a month ago, she mentioned the sausage fund raiser was coming up soon and they needed some help. I volunteered for the day to help out.

Hungarian Reformed Church Lorain, Ohio

Photo by Michael Gyula Szabó

I arrived around 7:15 am, there were already five or six guys setting up. George, the man in charge, quickly gave me a job of helping load the sausage press. I was amazed at the amount of meat being mixed, six hundred pounds! The sausage press was a 1924 press that has been modified over the years with a late model motor and valves. A pneumatic machine that generates air to operate the internal ram pressing the meat out the stuffing horn.

1924 Sausage stuffing machine

This was a cool machine! No guards, operate the air valve with vice grips and pray it doesn’t break down!

We used natural casings, the spice recipe was a secret, only George knew the ingredients!

I was amazed how fast the machine pushed the meat through the casings.

George had each of us rotate every 15 minutes to each position so all of us could learn each job.

Kolbasz (KOOL-bahss) is the generic Hungarian word for sausage

The smell was amazing!

There were many other jobs that day, weighing and packaging are shown below.

My mom, she looks great for 87 yrs young!

Packaged in 2 lb. bags, ready for customer pick up.

Overall I had a great day. We ended up making six hundred pounds of sausage, washed a bunch of pans and trays and some ladies fried up some sausage for lunch! It was great working with all the folks and hanging out with mom all morning.

Check out this homemade mixing spoon! It’s 3 foot long!

Restoring an old work bench top

I ran across this old workbench top that was discarded beside a dumpster. This top was removed from a school wood shop. The top was lying face down in the grass. As you can see in the first photo the surface was already drawing moisture into the maple boards. I have a metal rolling workbench in my shop that I cover with cardboard. This top would be perfect for a bench top upgrade! I loaded it up and took it home.

This maple butcher block style bench top was very heavy!

Every year at Christmas my son and his family travels back to Ohio to spend the holidays with us to visit family and friends. We enjoy cooking, hanging out and getting out in the shop to work together. This years project was the bench top restoration.

We started by planing the top with a hand power planer. I have a Porter-Cable planer, this makes short work of removing material.

My son Chuck planing off the top layer, exposing new wood.

After removing about an 1/8″ of wood, we hit it with the belt sander to smooth out any ridges.

After mounting the top and squaring the edges, we applied a coating of mineral oil and beeswax to the freshly sanded wood. My grandson Charlie was helping rub the wax mixture into the top.

Final task was mounting the old carpenters vice and heating up the wax with the heat gun.

Restoring an old anvil

I picked up this anvil a couple of years back thinking I would get it home and restore it the same week. Well that didn’t happen! At Christmas my son was home for a visit, we ran across it in the shop and decided to make a base for it. We found a piece of cherry log approximately 18″ in diameter, trimmed it up a bit and marked the shape of the anvil on one end.

After a bit of discussion on how to remove the end grain of this cherry, we decided on the router with a straight bit, freehand. Go slow if your doing this freehand, end grain will catch the router bit and it will run out on you!

The anvil must weigh at least 80-100 pounds! It has some faint markings on it “USA 0 . 3 . 19″ not sue of the maker. The top surface of the anvil had a large gouge or a burn out from a cutting torch. I welded the hole in using Eutectic 640 chrome alloy rod with my arc welder. I ground the weld down with my 4” grinder, then switched to a flap disk to clean the surface up. A bit of sanding and hitting the entire anvil with my wire cup, it was ready for a coat of paint. I sprayed it with primer then two coats of implement enamel from TSC. This is good paint. This will be a nice edition to the shop!

Soup broth!

Making your own soup broth is very easy. Requires no fancy recipe, yields a great product with very basic ingredients.

Having a large family, we usually prepare two Thanksgiving turkeys averaging around twenty pounds each. After carving and de-boning each bird, I freeze the carcasses for soup. Taking advantage of this past long weekend, I set aside a couple of hours to prepare this years soup broth. We use this broth as a base for most of our soup dishes.

I am fortunate to have an electric stove in my shop for all day simmering and baking dishes that will smell up the house! My wife appreciates this for sure.

Ingredients:

Carcass of a baked turkey or a couple of chickens. Store bought rotisserie chickens work too! Celery stalks, carrots, parsley and three medium onions. I shop our local grocery discount rack for my broth vegetables, outdated or bruised vegetables work great for this recipe. Rough chop the veggies, and separate the carcass a bit.

To a large stock pot (mine is a 20 quart) add the turkey or chicken and vegetables. Fill the pot with water three inches from the top. Add two tablespoons each of salt and peppercorns. Bring the pot to a boil, turn down to a simmer for a minimum of four hours. Strain and fill the broth into quart soup containers. I purchase these containers from Amazon.

Let cool overnight, cap the filled containers and freeze. These will keep up to a year in the freezer.

Giving new life to an old dutch oven

I was helping my mom the other day re-arranging some stuff in her attic. Mom is 83, a very active 83, but I still get nervous for her to pull the garage attic ladder down and navigate the stairs. As she was digging around some boxes, she asked if I wanted my grandmothers dutch oven? I was thrilled! Its an old #9 Griswold dutch oven with a Tite -Top lid. The inside is a bit pitted and rusty, but definitely usable. My grandmother on my fathers side was an outdoors woman from West Virginia. She loved to camp and fish the rivers for trout. This dutch oven was used over an open camp fire many, many times.

After a couple of hours of sanding and hitting it with a wire cup and grinder, it was ready for seasoning. I cant wait to start cooking in it and taking it camping for a pot of chili.

Cowboy Kent Rollins has a great YouTube video on how to season and care for cast Iron. Check it out!

Making a wire clamping tool

Having the right size hose clamp on hand or needing a large clamp usually means a trip to the big box store. Worse yet, not having a clamp that fits in your emergency bag while on a trip.

Here’s an easy project to make your own wire clamp tool.

There are a bunch of designs on YouTube and some great videos on how to build them step by step. My version is very simple, an old router wrench and a 7/16″ bolt and washer. I filed a notch in the end of the wrench to accept the wire loop and drilled a 7/16″ hole in the wrench. I cut the threads off the bolt and drilled two 3/16″ holes in the bolt to accept the wire. You can go smaller, I chose 3/16″ so I could use 10 gauge wire for heavy wood binding. I welded a washer between the holes on the bolt to control the bolt on the wrench. You can use any size wire you would like. For the mallet repair, I used 10 gauge galvanized wire. The small 3/8″ hose repair, I used galvanized bailing wire. You can use copper wire, coat hanger or aluminum wire.

This tool and 10 feet of bailing wire will definitely be in my vehicle emergency bag!